
Supplied by AMK Computer
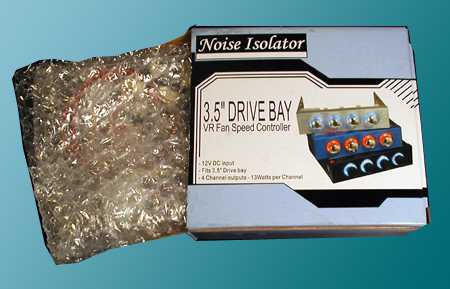
When a computer is referred to as “the wind tunnel” it’s time to take control of its fans. The Noise Isolator VR Fan Speed Controller from AMK Computers claims it allows users to create the “best balance between
performance and noise level.” It fits into an empty 3.5″ drive bay and can individually control up to four fan sources.
Specifications:
- 4 channel output
- 13 Watts per channel
- 12V 10% DC input
- 12V PWM output to fans
- Silver, Black and Blue panels available
- Silver and black models come with blue LED back light
- Blue model comes with red LED back light
Package includes:
- Fan Controller
- Y-Splitter Power Cable
- 3-pin Extension cables (2)
- Mounting screws
- Instructions (very brief)
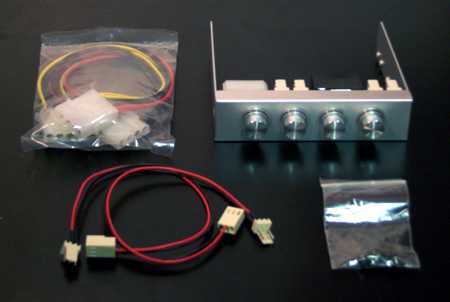
The components – the small bag contains the four screws
Impressions and installation
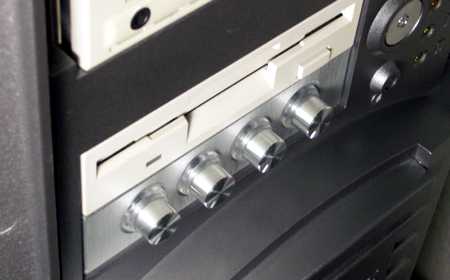
The first thing to notice about this product is the controller’s faceplate.
The review sample has a brushed metal appearance. A clear ring is around each
control knob that will glow blue once the product is powered. These two details
add a visual value to its practical worth.
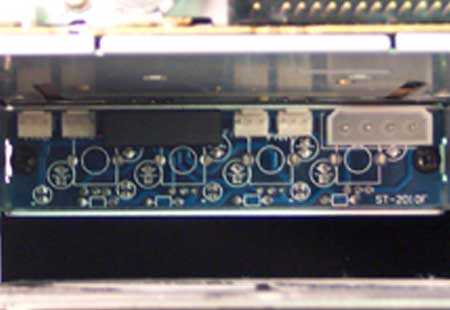
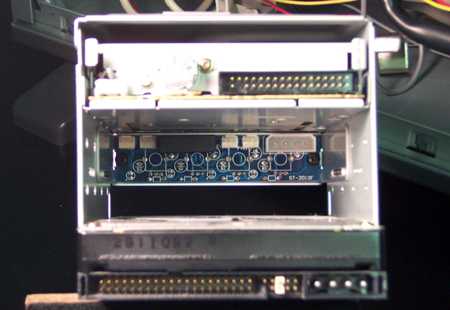
The back of the controller
The back of the controller has five plugs. Four plugs are 3-pin molex connectors.
The fifth is the 4-pin molex power connection from the PSU. The package includes
a Y-splitter power cable so this addition to your system will not use up an
additional PSU power connector.
At first the sides seemed slightly flimsy and the screws looked unnecessarily
small. The controller was a few millimeters shy of filling the 3.5-inch space.
As a result, the sides of the controller had to be bent apart to fit flush with
the interior sides of the cage prior to screwing into place. This may not be
common to every PC case.
The mounting screw holes were very close to each other. This brought up a concern
that the Noise Isolator controller would not be secured well. This became a
non-issue after all screws were tightened. The controller was anchored solidly
in place which also removed any concerns about the deceivingly flimsy sides.
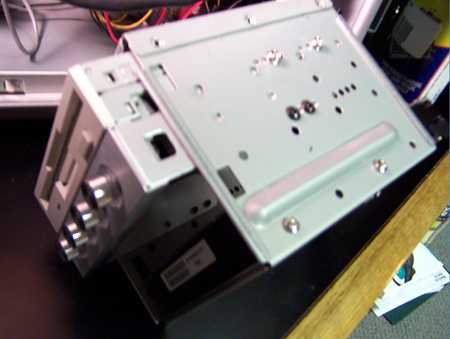
The controller mounted in the cage below my floppy drive
The first obvious question to ask about this product is “why are there
only two extension cables?” These 3-pin extensions allow fan cords to
reach the distance from the back of the drive cage to the plugs on the back
of the controller.
The back of the cage
The best reason one can infer is the manufacturer assumed two of the fans would
be at the rear of the PC and need an extension whereas two at the front would
not. It is important to note that there is another issue with the fan leads.
It’s very difficult to connect fan leads once the fan controller is in
the floppy cage; there’s no room to get a hand in there. The best way
to solve this would to be to connect an extension to each plug first. The ends
would then be within easy reach after the controller is mounted. Connecting
the fans before mounting is not practical because the cords are generally not
long enough for the maneuvering required. With only two extensions, a pair of
long forceps or needle nose pliers would have to be used to make the remaining
connections.
The manufacturer also assumes that the cooling fans will have 3-pin molex connectors
which may present a problem as some fans can have 4-pin molex connectors.
The test system is an Antec Server Case with six external fans: three exhaust
fans on the back (including the power supply fan), one exhaust fan on the side,
and two filtered intake fans on the front. This means five fans exist that could
potentially be controlled by this product. With only four control leads it meant
that two fans would have to be run off one control rheostat. The Noise Isolator
has 13 watts per channel which is sufficient for loading two DC fans on a single
channel.
Since the front and side fans are closer to my ears, I decided those three
would be the most important to control. Because I did not then have room for
both the back two fans, I chose to connect neither. I would only use three of
the four available plugs on the controller.
Trouble
This is the point where I realized I had a problem.
The side fan and one of the front fans each have 3-pin molex connectors. The
second front fan has a 4-pin connection that splits off two wires to the fan
and leaves an extra 4-pin connection open for something else. This “convenient”
setup allows more fans to be added easily without needing 3-pin connections
from the power supply or special 3-pin splitters. For this task, that convenience
backfired. (It’s just as well I didn’t want to connect the rear
fans – both had this type of connection as well).
The only solution to this problem was to sacrifice one of the 3-pin extensions
to the soldering iron. I cut off the 4-pin connection of my second front fan
and soldered on the appropriate half of the 3-pin extension.
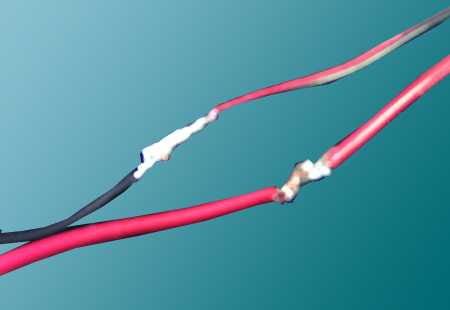
My sloppy soldering job – later covered by electrical tape
This left me with a single extension to use with the side fan. Again, there
were not enough extensions to connect the rear fans even if I had wanted to.
The extension for the side fan was connected before I mounted the cage, but
the front fans had to be connected via the forceps method due to the size restraints.
A snug space to plug in cords
Testing
With the controller installed, it was time to move on to some basic testing.
The documentation with the controller indicates that turning the fans to minimum
power would halve their speed from the maximum setting. Would the controller
significantly quiet the system and would it have an adverse effect on the temperature
if I did?
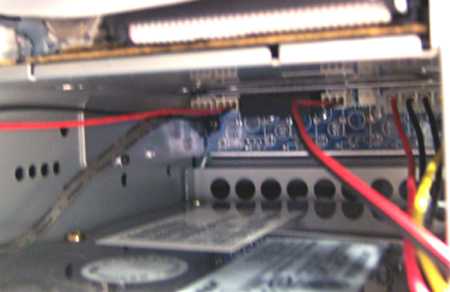
The controller installed prior to turning the computer back on
I took recordings of the sound levels one foot from the front, side, and back
of the machine, and approximately four feet away from it in the middle of the
room. They are measured in a unit called “decibels referenced to the full
scale signal” (dBfs). For our purposes, this simply means they are measured
in decibels with zero as the maximum value.
Please note that decibels are an exponential measurement. For example, if something
is one decibel louder, it is actually about 1.25 times louder. A two-decibel
increase is about 1.6 times louder.
|
Max
|
Min
|
Difference
|
|
|
Front
|
-27.4
|
-29.4
|
2 dBfs
|
|
Side
|
-28.1
|
-30.2
|
2.1 dBfs
|
|
Back
|
-28.8
|
-29.8
|
1 dBfs
|
|
Middle
|
-30.3
|
-31.4
|
1.1 dBfs
|
Notice that putting the fans to their minimum setting caused a two-decibel
decrease in sound next to the computer – approximately a 40% drop. There
was even a one-decibel drop in the back where there were no fans being controlled.
For the room in general, it caused approximately a one-decibel decrease, or
a 20% drop.
These are two sample clips of the sound levels in my room. The first is the
front of the machine at maximum power, the second is the same at minimum power.
Note that my computer sits on my desk next to me so the difference in sound
levels is very significant – more so than can be appreciated from these sound
clips alone. Remember they are just fan sounds so you may need to increase turn
up the volume.
Click to play.
Front of system, maximum power
Front of system, minimum power
Temperatures were largely unaffected by the speed settings in my system. Three different tests showed that at most a two-degree increase in CPU or motherboard temperatures resulted from the fans being turned back from maximum to minimum speed. This may vary by case size.
The brightness of the LED illuminating each control knob changes with the speed setting of the fan it controls.
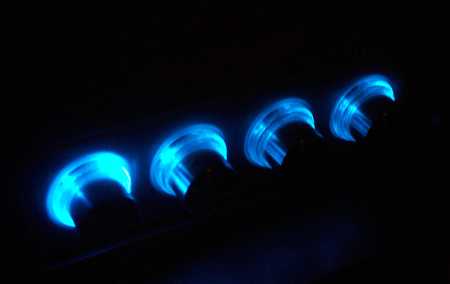
The obligatory glow-in-the-dark shot
Overall, the Noise Isolator VR Fan Speed Controller from AMK
Computers created a very significant reduction in sound levels from the
case fans, even with only three of the possible four slots in use. Its functionality
is augmented by its attractive design, and the fact that it fits in the spare
3.5-inch bay so many people have. This product has been in regular use on my
system for the past three weeks with satisfying results – my roommate
and I are sleeping a little easier. However, for the price, it would not be
much to ask for two more 3-pin extensions to accompany the product for ease
of use. Remember that only 3-pin fans are compatible. Those “convenient”
4-pin fans will need a taste of the soldering iron.
Our thanks to AMK Computers for the Noise Isolator 3.5″ Bay Fan Speed Controller.
Highs
- Reduce fan noise
- Fits in 3.5″ bay
- 13 watts per channel
Lows
- Only two included leads
- Leads are 3-pin molex
- Fan plugs are hard to reach once installed
| Attribute | Score | Comments |
|---|---|---|
| Bonus items & software | 7 | The power splitter was a nice addition, but where are the other two extensions? |
| Design & layout | 9.5 | The brushed metal and LEDs look great. Friends wanted to come over to see it. |
| Documentation | 6.5 | It’s only one side of a small sheet of paper and doesn’t say much. A suggestion on how they expected the cords to be connected in that tiny space would be nice. |
| Performance & stability | 9.5 | |
| Presentation | 9 | Item-specific packaging for a fan controller is impressive enough, and the parts all arrived snug and secure inside the bubble wrap. |
| Price / value | 8.5 | The LEDs are worth a little extra cash, I guess. |
| Total score | 50/60 | 83.3% |


 Articles RSS