
Another mATX Build.....
Decided my first worklog entry would match my first overclocking post. This one was overclocked in OC'ing a Biostar Tf7025 & Brisbane 4400+. As this is a past build I’ve shown a time line of the build and as typical of all of my builds its final configuration. Bit of a warning…..I can get a bit wordy and picture crazy with my work logs. Also I tend to “name†my systems and you’ll see a few references though out this and any others I post. If this goes against the grain let me know…..
<O:p
05/07/08
<O:p
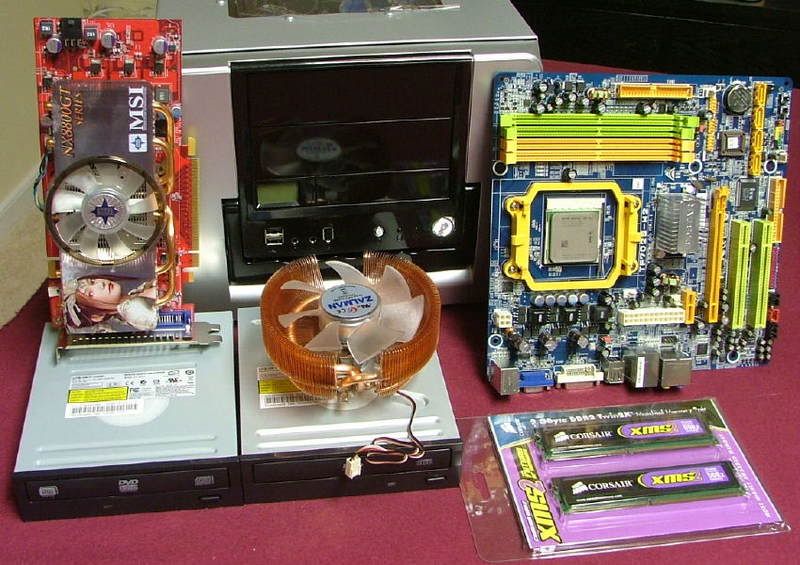
I built a NF7-S system for a friend who decided he would like a micoATX gaming system “like mineâ€â€¦.that being either DreamCatcher v2.0 (less wc’ing) or Yoda’s SMN (you’ll get a chance at seeing those also if there is a desire!). So here be his system’s (Silver Bullet) specs:
<O:p
Case: Ultra MicroFly
PSU: Ultra 600W (from a MX6)
Mobo: Biostar Tf 7025-M2
CPU: AMD 4400+ Brisbane (CAA4C 0725WPDW) w/ zalman CNPS8700
GPU: MSI NX8800GT OC (Dual Slot version)
Memory: 2 x 1024 Corsair CM2X1024 – 6400C4
HDD: TBD
Optical Drive #1: Lite-On SATA DVD-R #DH-16D2S-04
Optical Drive #2: Lite-On SATA DVD-RW+ #LH-20A1S
FDD: Mitsumi Card Reader/ Writer + Floppy
<O:p
Here you see most of the parts…..
<O:p
<O:p
Actual case modding will be very little. Will take out the front and rear fan grills, drill some cooling holes in the face plate like YsSMN, and then see what goes from there. One interesting thing we’re going to try is to use an 80mm Tt SmartFan 2 in the front spot and control its speed via the system fan header that is on the mobo. It if works like my nView the speed of the fan will be controlled by the mobo’s system temp sensor…..should be interesting!
<O:p
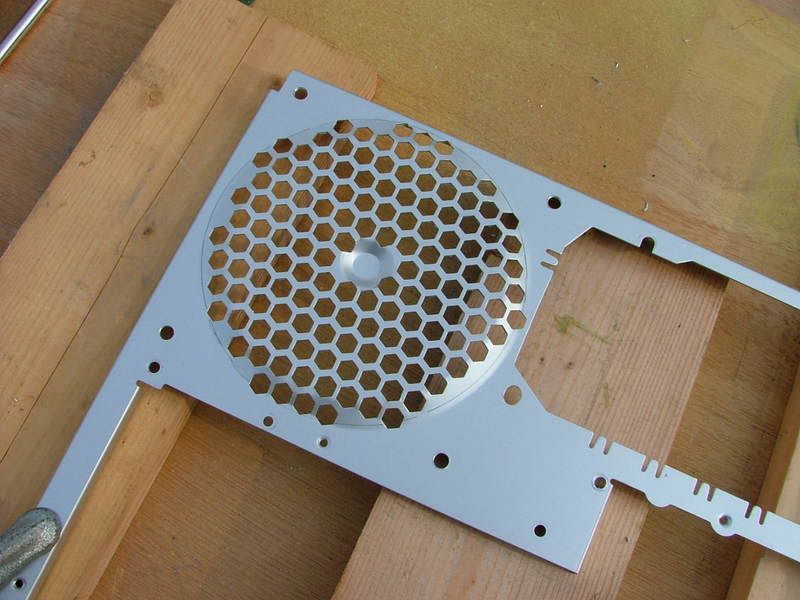
The only chassis mod is the usual “remove factory tamped fan grills†thing. Don’t know how many MicroFly builders are reading this, but counting the MX6 this will be my third with this chassis. I have always had issues with the PSU flexing the case and now think I know why. By removing the stamped 120mm fan grill a lot of the rigidity in the back side of the case has disappeared. In the “I wonder if this would help†department I’m not going to mount the PSU until after the 120mm fan and finger grill are installed. In the first two builds the PSU has been in place without the fan and grill giving some support and that may have been what “sprung†the case.
<O:p
These “before†and “after†pics from DreamCatcher shows how much metal “disappearsâ€.
<O:p></O:p>

<O:p
05/10/08
<O:p
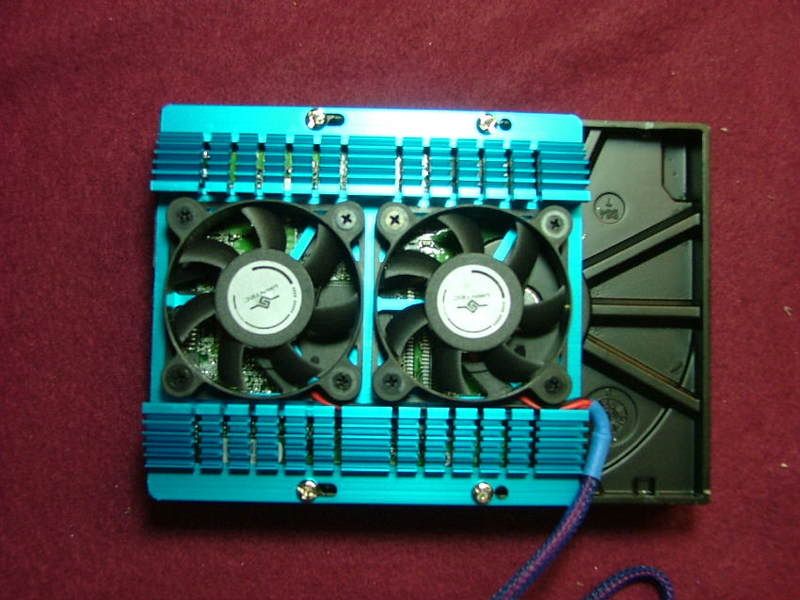
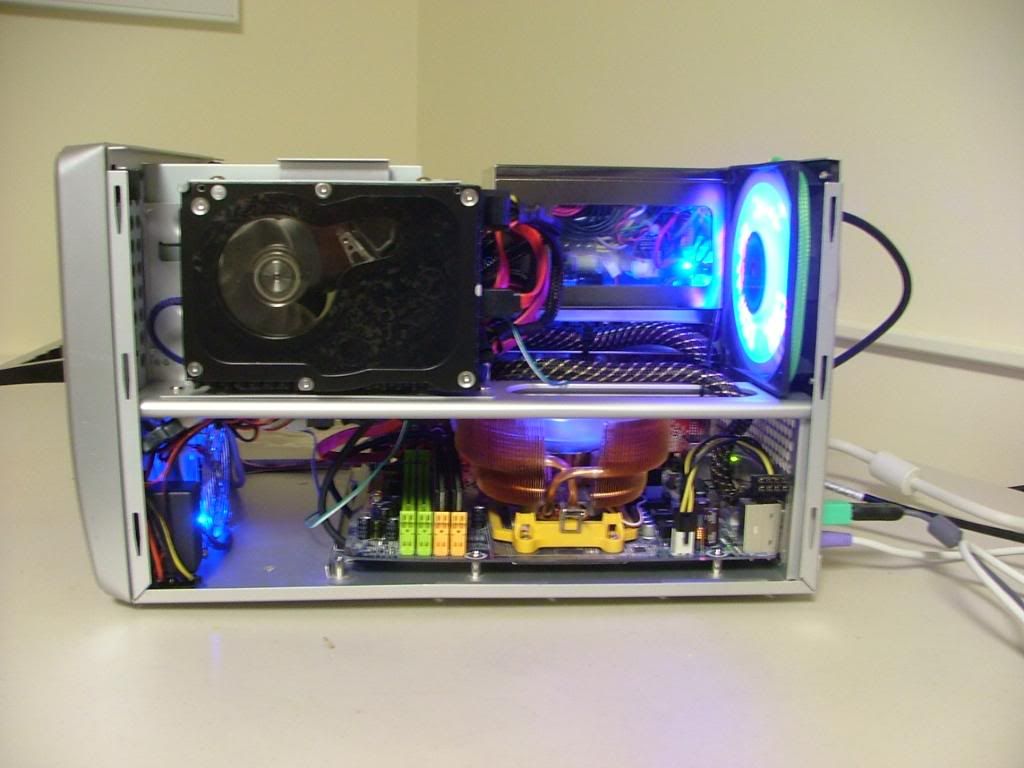
Slow in moving on this thing, but I did manage to mount the front 80mm, FDD, and the two optical drives. Also modded the HDD carrier so I could mount the HDD cooler. The tabs have to be bent up a little to allow for the extra thickness of the cooler and one needs to be cut to miss a mounting screw. Here is a good example how everything is the same but different, made the cut base on the one in DreamCatcher and it ended up be a little “too bigâ€. I will always be a fan of this particular cooler by Vantec. I’m using them on YsSMN’s Raptor X and the 74GB Raptor in BHrDx.
<O:p></O:p>

<O:p
While mounting the mobo to the mobo tray came across something, to me anyway, rather different. The Biostar 6100-939s I used in YsSMN and BHrDx are 24.5cm square and so are my two abit NF-M2 nViews. However the Tf7025 for this build is supposedly 24.3cm x 24.4cm and so this is what I ended up with when mounting the mobo…..
<O:p

<O:p
This must have been part of the design and one of the reasons the PSU power connector was moved to where it is. Don’t want to remove the standoffs incase this case gets another board that will “fitâ€. So guess I’ll just tape them up to avoid any potential of shorting something.
<O:p
The expansion slots on the mobo tray have guide “dimples†to help anchor cards when mounted. This is cool except when mounting something like a dual slot GPU. So did a quick and dirty mod for that.
<O:p
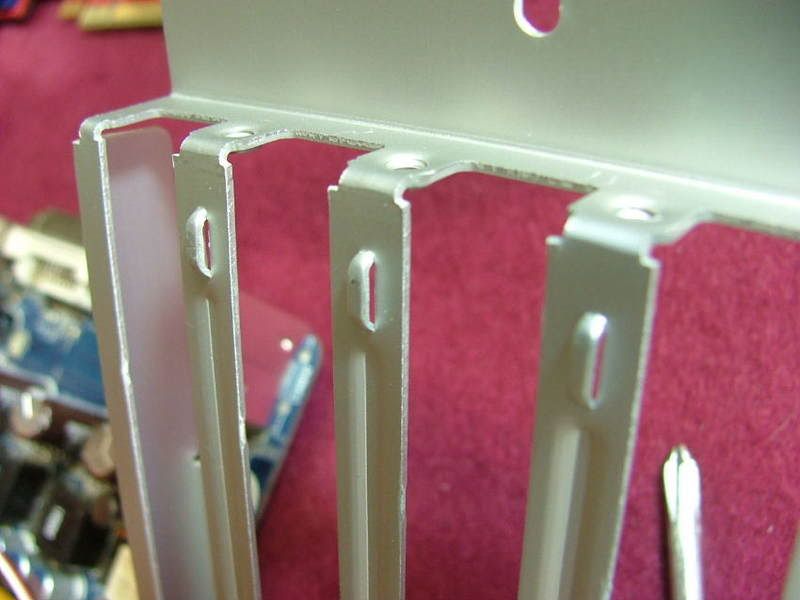
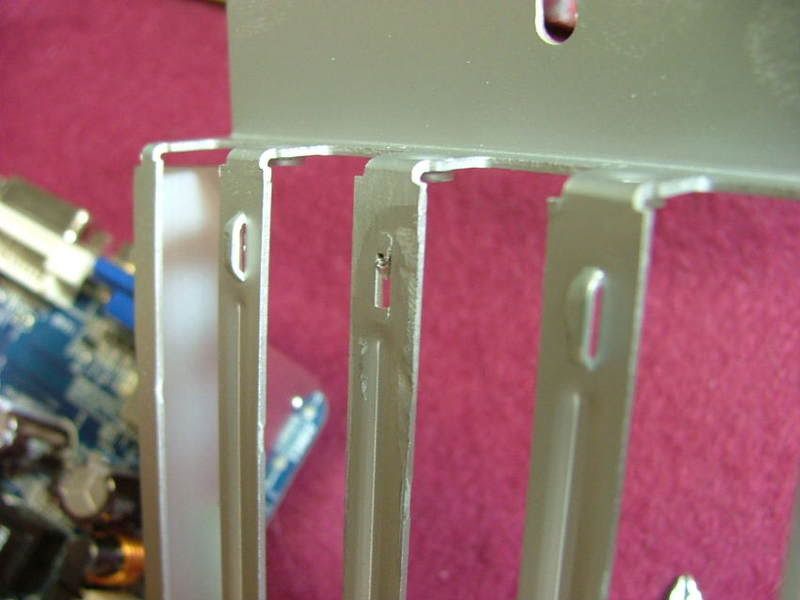
<O:p
<O:p05/12/08
<O:p
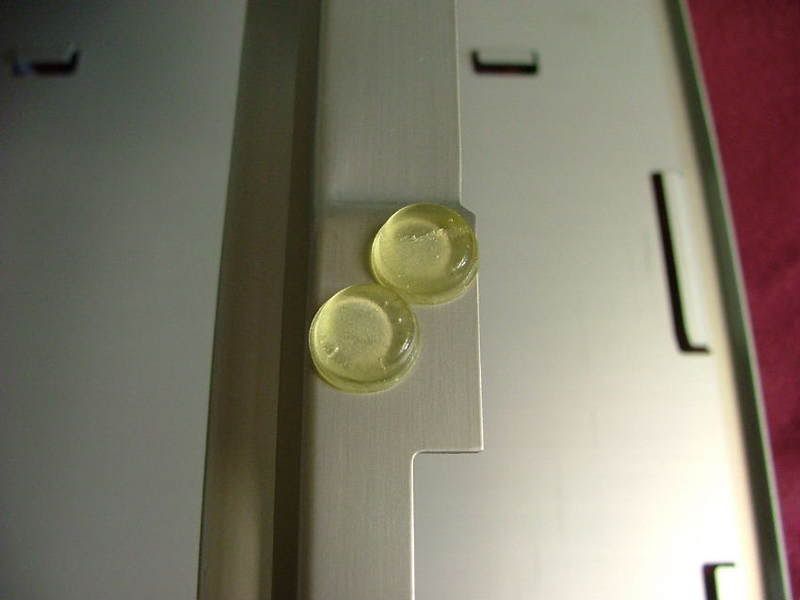
The fan grill came in so the rear fan and grill have been installed and the rigidity of the rear defiantly improved. Also had an inspiration as the PSU still wanted to “bow†the top towards the front. Decided to find something that would function as a spacer but not contribute to ambient noise by transmitting vibration to the chassis from the PSU. Went to the garage and raided by small parts bin and found a few picture “bumpers†that were about the right height. Stuck a couple to the chassis and it seems to be doing the trick, also being soft rubber there is not vibration issues.
<O:p
<O:p
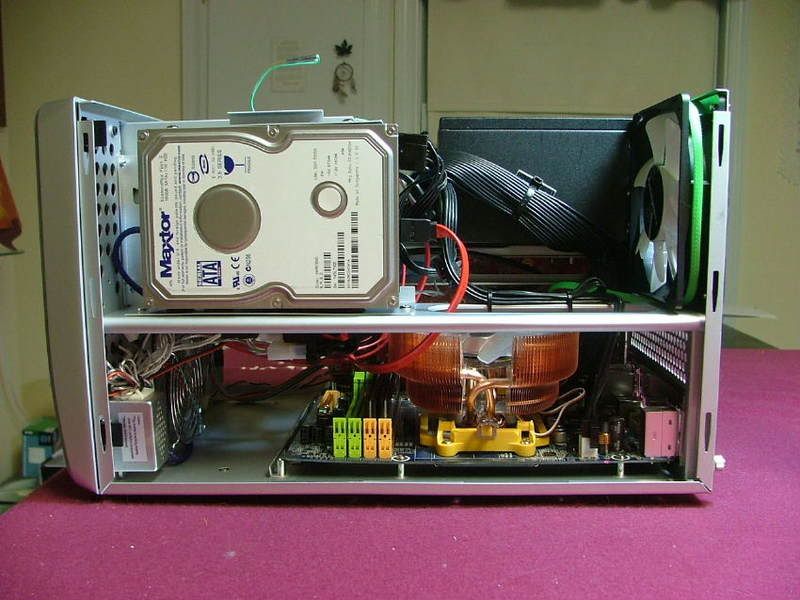
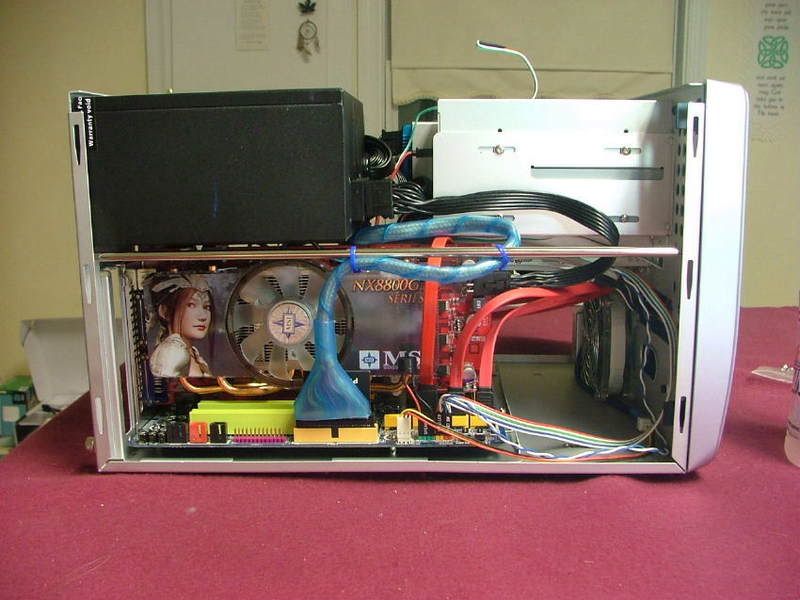
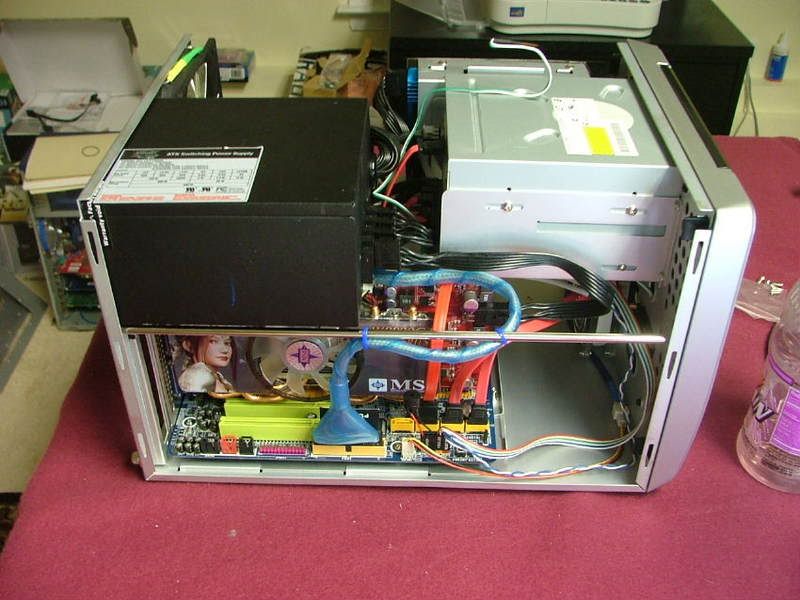
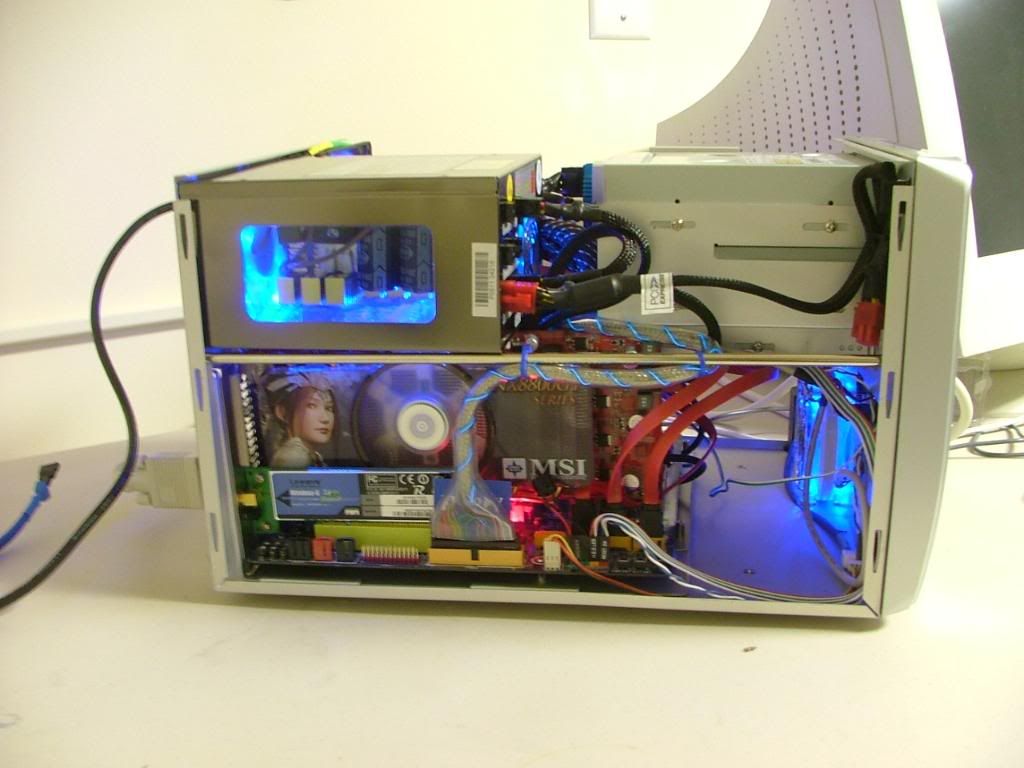
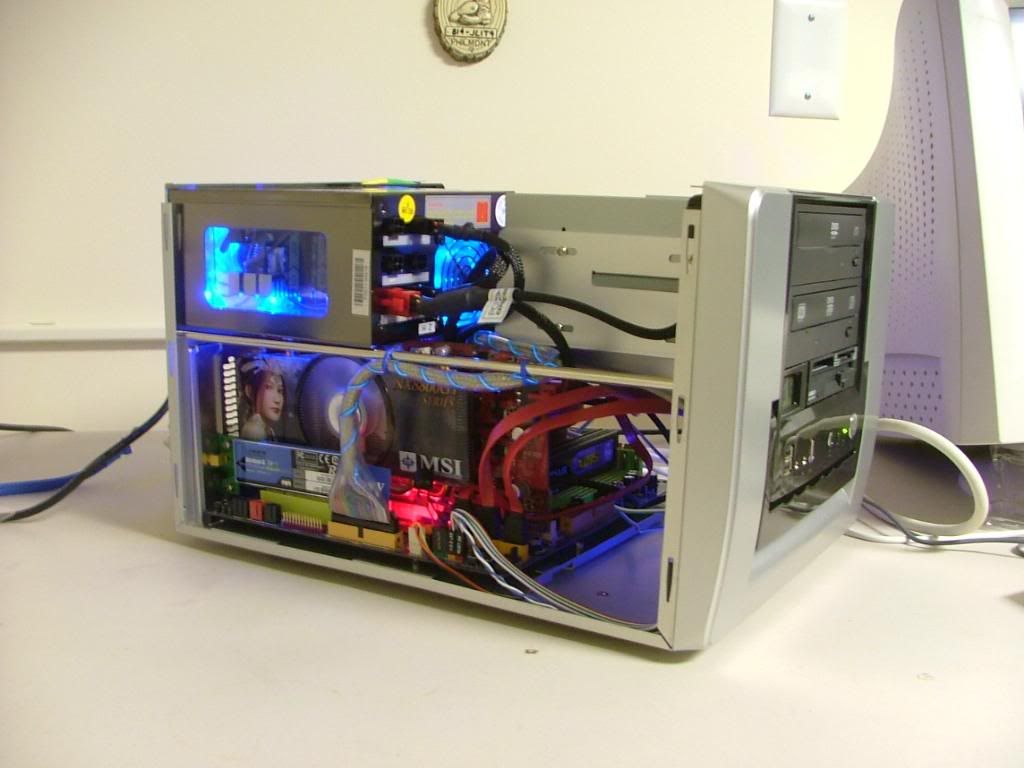
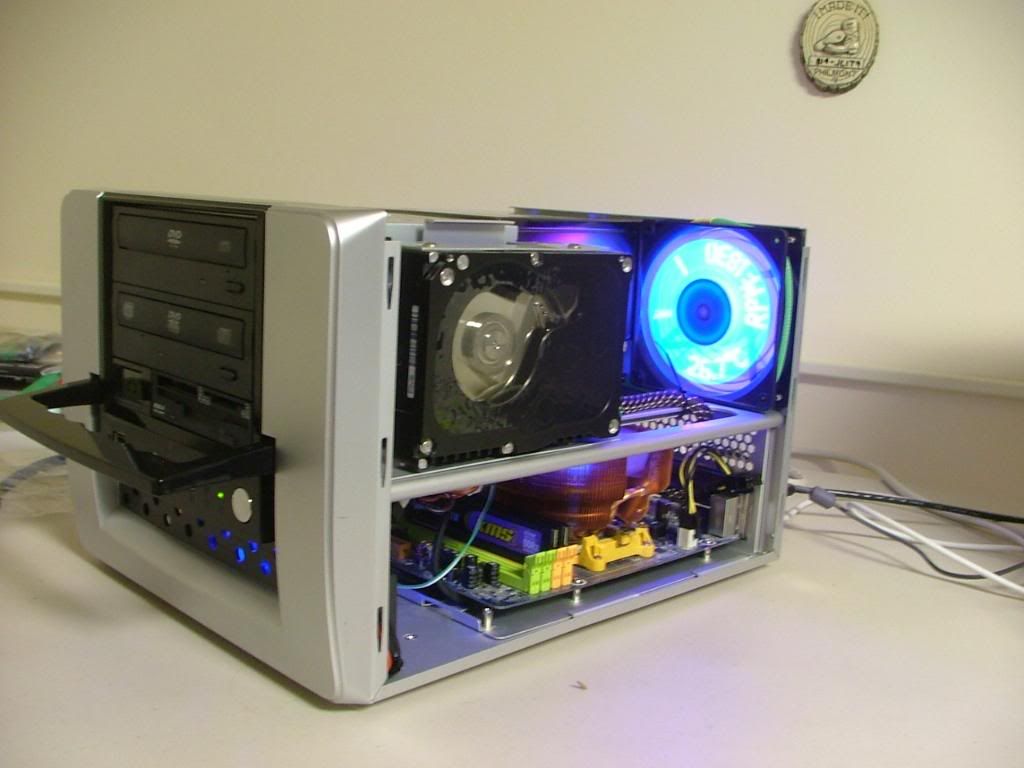
Installed the mobo, PSU, and few other goodies to see if the system will run and it did!! Now on to do wire management. The Ultra PSU came out of an MX6 so all cables are short so don’t cause much clutter. As of right now think I like a little extra length to make routing easier! The Tf 7025 has the 24 pin power plug towards the rear (I/O) of the mobo and this almost has it under the PSU in the MicroFly. Between a short cable and socket location a little planning is required when pulling out the mobo tray……especially with a CNPS8700 as you HSF. Initially when installing / removing the power cable one will have to pull the tray out about 2 – 3†just enough to get one’s hand in to unplug the cable before pulling the tray the rest if the way out.
<O:p
The following are some “general†pictures as I was putting it together and trying to do the wire management. Thought I had it finished but it seems the FDD cable EL regulator has died. Now I need to take it apart to see what I can do.
<O:p

<O:p
<O:p
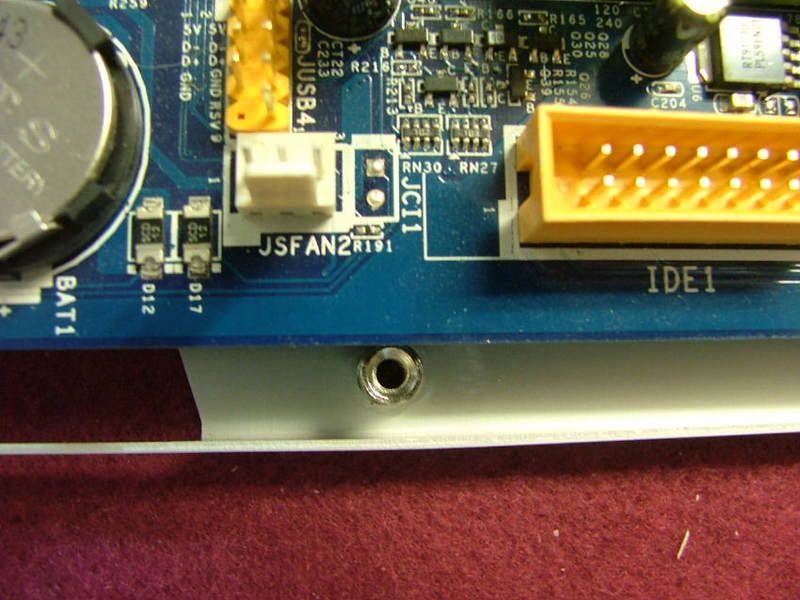
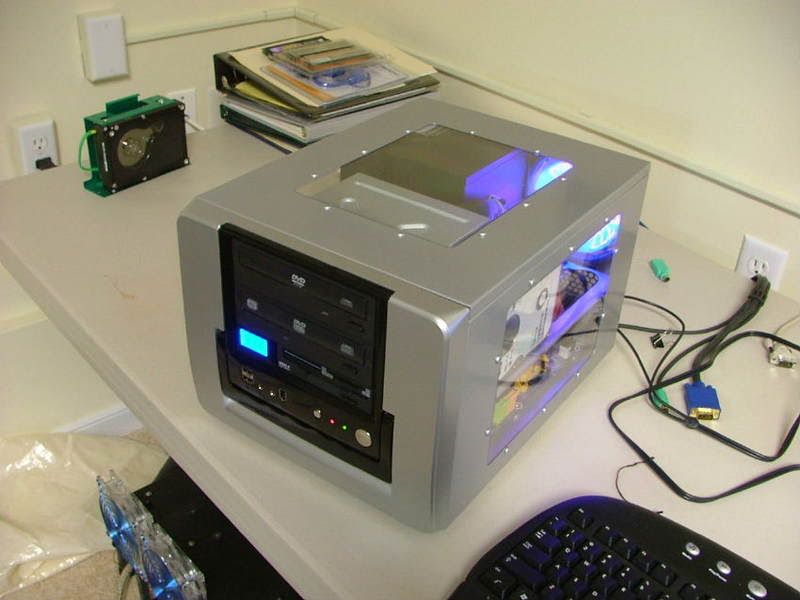
Also added some cooling holes under the handle to help with interior cooling.
<O:p
<O:p
Gonna let the owner take it home and replace the FDD cable when it comes in. I had forgotten about putting in the cooling holes so had to take everything cable wise apart to do it. In the process I managed to "break" the EL regulator! :bang:
<O:p
10/13/09
<O:p
The system came back to me because it seemed to “lockup†while the owner was play his “Command and Conquer†games. Not sure if I mentioned it in the oc’ing thread but all I did was back off the OC on the CPU.......now at 255 x 11 = 2.8GHz believe I had it originally at 266 x 11 then dropped it back to 260 a few months ago.
<O:p
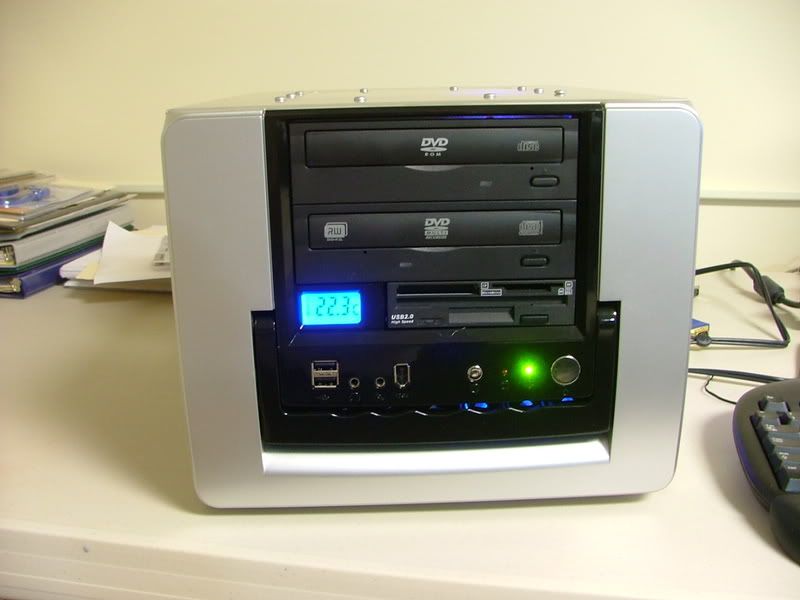
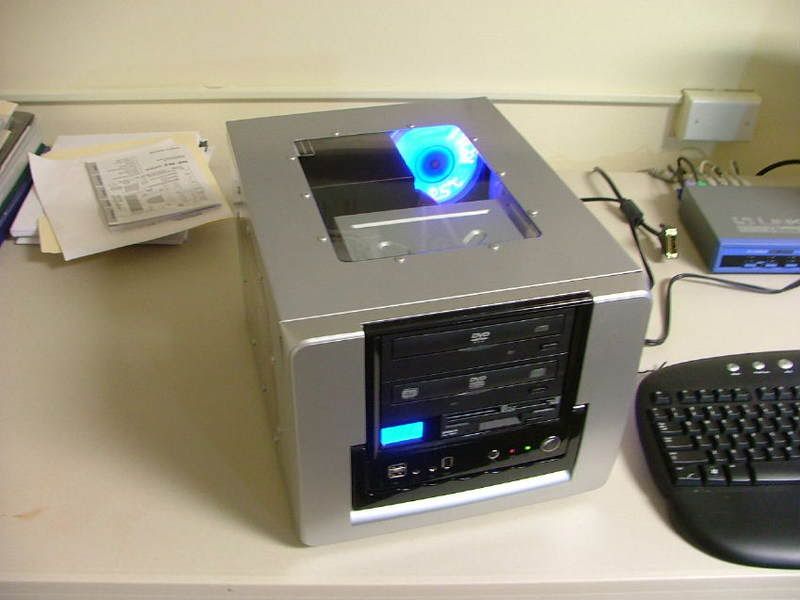
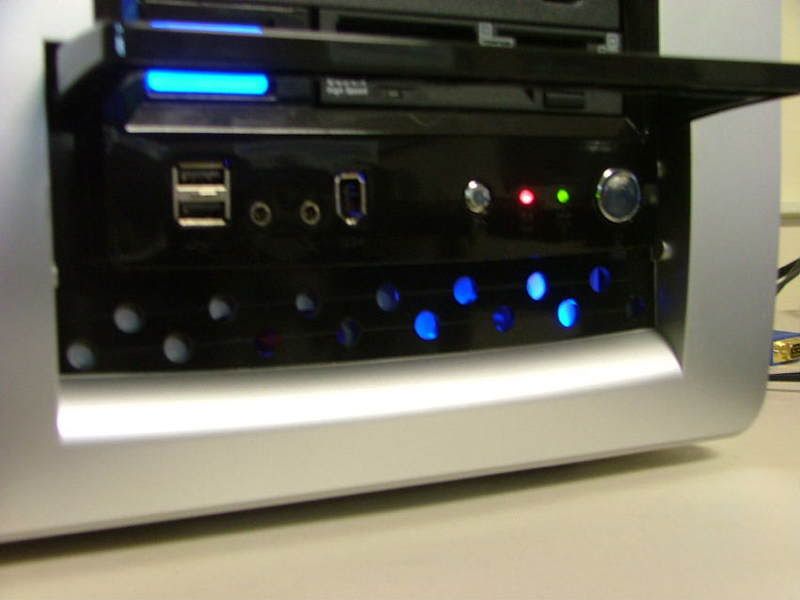
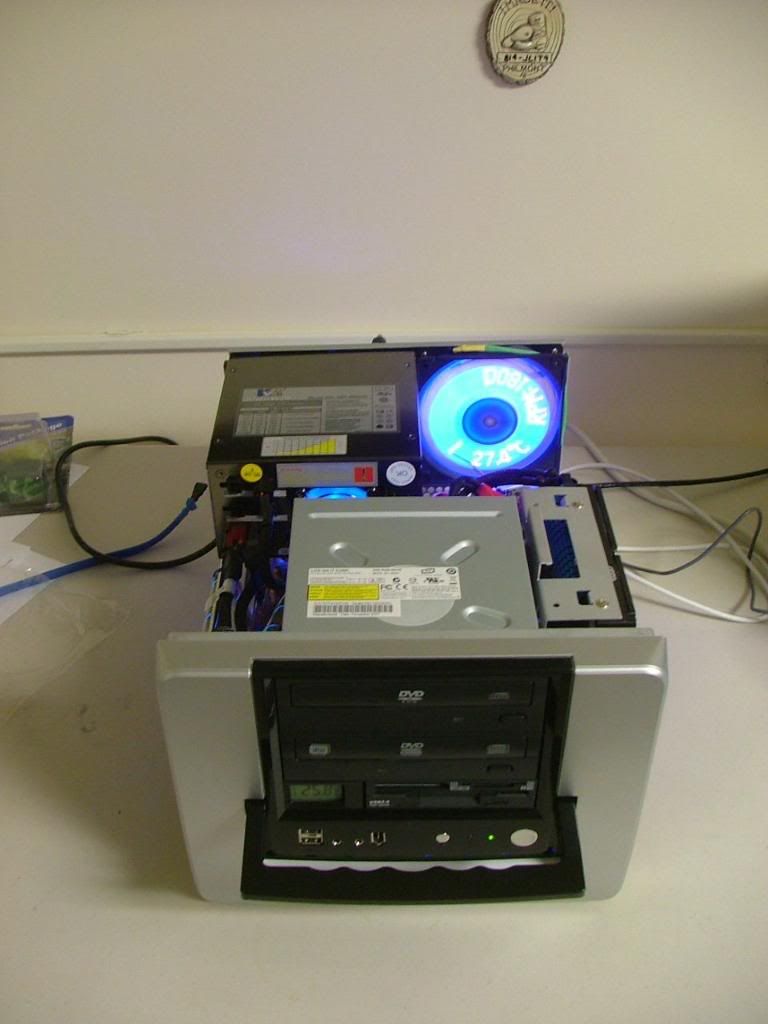
Besides the overclock it has gone through some changes as the HDD is now a 150 Raptor X and the PSU was swapped out for a Kingwin ABT-600CW for bling. Surprisingly the 1 x 80 and 1 x 60 don't add that much noise and seems to cool "slightly" better.
<O:p
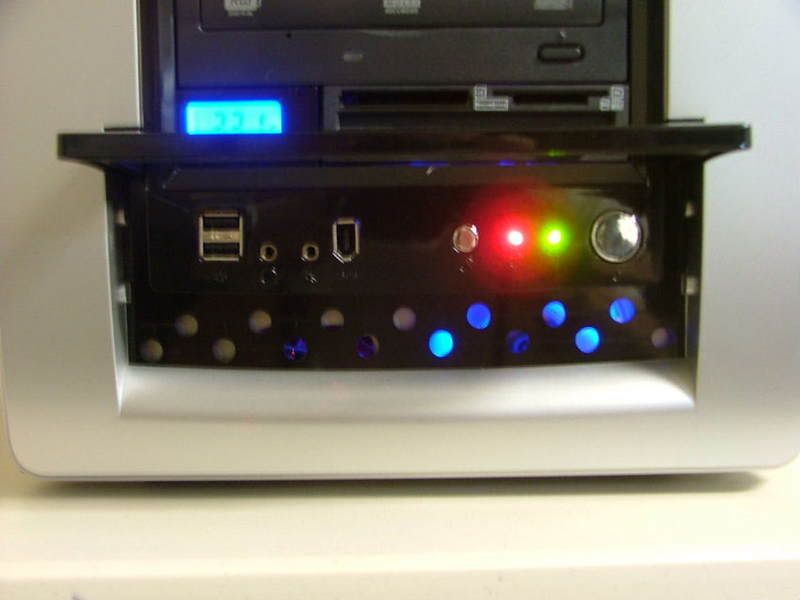
Here are a couple of pics to show the changes.......the Ultra's flat power cables did make for a neater package though!
<O:p
<O:p
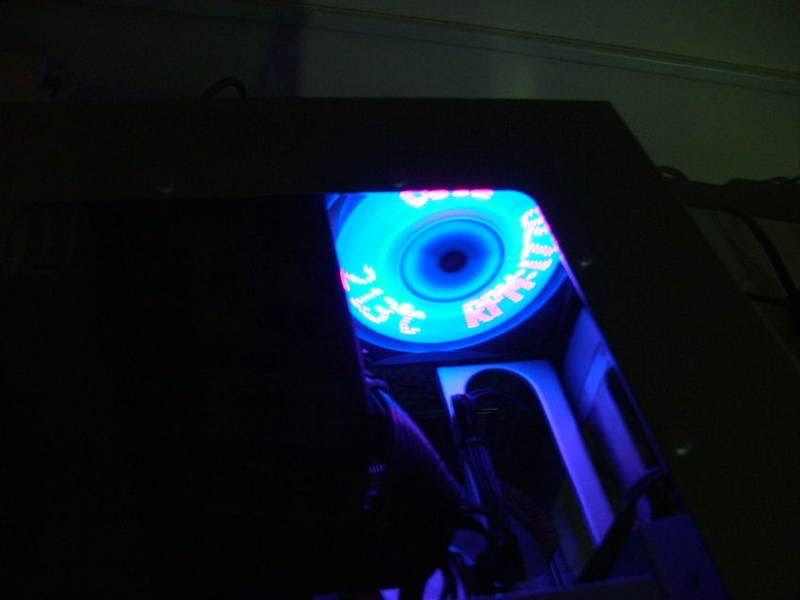
Interestingly enough there is only 2C difference between the case temp gauge (probe mounted over the HSF look closely at the bottom of the fan) and the temp probe that is part of the 120mm in the rear.
<O:p
05/07/08
<O:p
I built a NF7-S system for a friend who decided he would like a micoATX gaming system “like mineâ€â€¦.that being either DreamCatcher v2.0 (less wc’ing) or Yoda’s SMN (you’ll get a chance at seeing those also if there is a desire!). So here be his system’s (Silver Bullet) specs:
<O:p
Case: Ultra MicroFly
PSU: Ultra 600W (from a MX6)
Mobo: Biostar Tf 7025-M2
CPU: AMD 4400+ Brisbane (CAA4C 0725WPDW) w/ zalman CNPS8700
GPU: MSI NX8800GT OC (Dual Slot version)
Memory: 2 x 1024 Corsair CM2X1024 – 6400C4
HDD: TBD
Optical Drive #1: Lite-On SATA DVD-R #DH-16D2S-04
Optical Drive #2: Lite-On SATA DVD-RW+ #LH-20A1S
FDD: Mitsumi Card Reader/ Writer + Floppy
<O:p
Here you see most of the parts…..
<O:p
<O:p
Actual case modding will be very little. Will take out the front and rear fan grills, drill some cooling holes in the face plate like YsSMN, and then see what goes from there. One interesting thing we’re going to try is to use an 80mm Tt SmartFan 2 in the front spot and control its speed via the system fan header that is on the mobo. It if works like my nView the speed of the fan will be controlled by the mobo’s system temp sensor…..should be interesting!
<O:p
The only chassis mod is the usual “remove factory tamped fan grills†thing. Don’t know how many MicroFly builders are reading this, but counting the MX6 this will be my third with this chassis. I have always had issues with the PSU flexing the case and now think I know why. By removing the stamped 120mm fan grill a lot of the rigidity in the back side of the case has disappeared. In the “I wonder if this would help†department I’m not going to mount the PSU until after the 120mm fan and finger grill are installed. In the first two builds the PSU has been in place without the fan and grill giving some support and that may have been what “sprung†the case.
<O:p
These “before†and “after†pics from DreamCatcher shows how much metal “disappearsâ€.
<O:p></O:p>
<O:p
05/10/08
<O:p
Slow in moving on this thing, but I did manage to mount the front 80mm, FDD, and the two optical drives. Also modded the HDD carrier so I could mount the HDD cooler. The tabs have to be bent up a little to allow for the extra thickness of the cooler and one needs to be cut to miss a mounting screw. Here is a good example how everything is the same but different, made the cut base on the one in DreamCatcher and it ended up be a little “too bigâ€. I will always be a fan of this particular cooler by Vantec. I’m using them on YsSMN’s Raptor X and the 74GB Raptor in BHrDx.
<O:p></O:p>
<O:p
While mounting the mobo to the mobo tray came across something, to me anyway, rather different. The Biostar 6100-939s I used in YsSMN and BHrDx are 24.5cm square and so are my two abit NF-M2 nViews. However the Tf7025 for this build is supposedly 24.3cm x 24.4cm and so this is what I ended up with when mounting the mobo…..
<O:p
<O:p
This must have been part of the design and one of the reasons the PSU power connector was moved to where it is. Don’t want to remove the standoffs incase this case gets another board that will “fitâ€. So guess I’ll just tape them up to avoid any potential of shorting something.
<O:p
The expansion slots on the mobo tray have guide “dimples†to help anchor cards when mounted. This is cool except when mounting something like a dual slot GPU. So did a quick and dirty mod for that.
<O:p
<O:p
<O:p05/12/08
<O:p
The fan grill came in so the rear fan and grill have been installed and the rigidity of the rear defiantly improved. Also had an inspiration as the PSU still wanted to “bow†the top towards the front. Decided to find something that would function as a spacer but not contribute to ambient noise by transmitting vibration to the chassis from the PSU. Went to the garage and raided by small parts bin and found a few picture “bumpers†that were about the right height. Stuck a couple to the chassis and it seems to be doing the trick, also being soft rubber there is not vibration issues.
<O:p
<O:p
Installed the mobo, PSU, and few other goodies to see if the system will run and it did!! Now on to do wire management. The Ultra PSU came out of an MX6 so all cables are short so don’t cause much clutter. As of right now think I like a little extra length to make routing easier! The Tf 7025 has the 24 pin power plug towards the rear (I/O) of the mobo and this almost has it under the PSU in the MicroFly. Between a short cable and socket location a little planning is required when pulling out the mobo tray……especially with a CNPS8700 as you HSF. Initially when installing / removing the power cable one will have to pull the tray out about 2 – 3†just enough to get one’s hand in to unplug the cable before pulling the tray the rest if the way out.
<O:p
The following are some “general†pictures as I was putting it together and trying to do the wire management. Thought I had it finished but it seems the FDD cable EL regulator has died. Now I need to take it apart to see what I can do.
<O:p
<O:p
<O:p
Also added some cooling holes under the handle to help with interior cooling.
<O:p
<O:p
Gonna let the owner take it home and replace the FDD cable when it comes in. I had forgotten about putting in the cooling holes so had to take everything cable wise apart to do it. In the process I managed to "break" the EL regulator! :bang:
<O:p
10/13/09
<O:p
The system came back to me because it seemed to “lockup†while the owner was play his “Command and Conquer†games. Not sure if I mentioned it in the oc’ing thread but all I did was back off the OC on the CPU.......now at 255 x 11 = 2.8GHz believe I had it originally at 266 x 11 then dropped it back to 260 a few months ago.
<O:p
Besides the overclock it has gone through some changes as the HDD is now a 150 Raptor X and the PSU was swapped out for a Kingwin ABT-600CW for bling. Surprisingly the 1 x 80 and 1 x 60 don't add that much noise and seems to cool "slightly" better.
<O:p
Here are a couple of pics to show the changes.......the Ultra's flat power cables did make for a neater package though!
<O:p
<O:p
Interestingly enough there is only 2C difference between the case temp gauge (probe mounted over the HSF look closely at the bottom of the fan) and the temp probe that is part of the 120mm in the rear.
0
Comments
Was hoping to get others to start posting theirs as I have three more versions of the MicroFly / MX6 to show as well as a water cooled Silverstone SG01 Evo and mATX acrylic build. Just don’t want to hog the topic.......:(!