This is how I would probably learn how to swim today:
1. Decide to learn how to swim
2. Find the deepest point in the pool
3. Jump in
4. Flail until I stop dying
It isn’t always the best way to learn how to do things, but it sure can be fun. It’s also how this article came to be. See, two years ago some Icrontians met a company called Ice Dragon Cooling. They showed off their eponymous product, and we thought it was a pretty cool idea. In fact it was named one of our five favorite things of CES 2010.
Deciding to learn
The idea of Ice Dragon Cooling nanofluid continued to intrigue me, even though I had never dabbled in liquid cooling. Finally, I decided the time was right, and I was going to jump feet-first into the pool, as it were.
So why liquid cooling when there are some excellent air coolers out there that do an awesome job? Part of it is looks. It’s one thing to have a good system with a giant heatsink attached to the motherboard, but there’s a certain wow factor when a series of tubes is running through the case carrying liquid throughout. A well laid-out loop just looks better. The other part is that I’d been looking for a project involving something I hadn’t done before.
The decision to actually begin working on liquid cooling came about during CES 2012. I passed by the Ice Dragon Cooling booth and stopped to say hello and see how things were going. They saw the Icrontic name and were immediately excited; they remembered being named in that CES 2010 writeup from two years ago (which is impressive because I can barely remember what happened today) and wanted to know if we had a liquid cooling setup available. We didn’t, I had to inform them, but I promised to try and get something together and let them know when it was ready.
Unfortunately, sourcing parts or kits for review didn’t pan out the way I had hoped. So when Ice Dragon sent a follow up message in late February asking if I was ready to test, I decided to bypass the review unit route and just build my own loop. And so the adventure began.
Finding the deepest point
This won’t actually be my first liquid cooler—AMD sent their FX cooler after our Bulldozer CPU review—but it will be my first full DIY loop. The AMD-branded solution is a re-branded Asetek setup, and quite frankly it’s a bit disappointing. There’s a big tradeoff—you can have low noise or decent cooling, but not both at the same time. I’ve fiddled with the control software to set up a fairly balanced ramping of the pump and fan speeds to minimize any sudden loud noise, but it’s just not enough…especially during CPU intensive tasks. There just isn’t a way to keep the CPU cool and do awesome things using the FX liquid cooler.
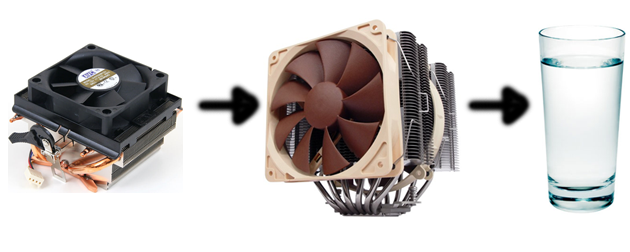
I have two goals for the first part of the project that can best be described as cooling and surviving. The cooling goal is to get better results than the Noctua NH-D14 at equal noise levels. I’m not saying the Noctua cooler is bad—it’s absolutely the best heatsink I’ve ever used. I’d just like to see if something better can be achieved through more exotic methods.
The second goal is to not fry the computer. I know that with a little attention to what’s going on, liquid cooling is safe. The problem is that paranoid little voice in the back of my head that says it’s going to go pear shaped. The potential issues are leaks due to bad connections or breaks in the tubing.
And here’s the biggest problem: I started out knowing nothing about the components of a cooling loop.
Jumping in
Fortunately there are several Icrontic members who have a lot of experience and are more than willing to help. After some consultation on the forum, these are the components that were selected:
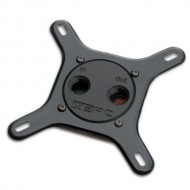
- CPU Block: XSPC Rasa High Performance cooling block. Reviews around the web are pretty favorable to this block. It’s not the most flashy part on the market, but I’ll take performance over looks any day.
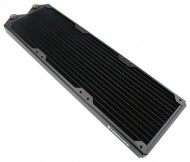
- The radiator is a Koolance Triple 140mm copper high flow radiator. It’s going into a big case, and there’s plenty of room to hold something like this. Right now it’s a bit of overkill, but future plans will benefit from the initial overbuild.
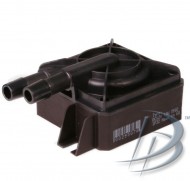
- The pump is a Danger Den / Laing DDC rev. 3.25 liquid cooling pump. This is supposed to be one of the best pumps available, and should be pretty quiet. It’s powerful and efficient, and should last a long time.
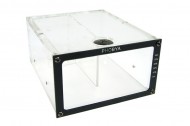
- For the reservoir, I chose the Phobya acrylic dual 5.25″ bay reservoir. It doesn’t have any fancy lighting or digital readout, but it’ll hold plenty of coolant and I can always use an IR thermometer to get temperatures if needed. The thought process here is that the increased liquid capacity will allow for the removal of more heat after the “hot” side of the cooling loop has passed through the radiator.
- As for tubing, several feet of Tygon R-3603 7/16″ ID, 5/8″ OD were purchased. This tubing should be flexible enough to be routed through the case while remaining strong enough to not break easily.
- Liquid: I haven’t settled on a final product yet, but this is by design. I’d like to try several different products to see if there’s a big difference in performance. Distilled water will be tested as a baseline since it’s about the cheapest and easiest thing to find. Ice Dragon Cooling is sending a review sample of their product. If anyone has other suggestions for cooling liquids, I’d be interested to hear them.
This will all go into the NZXT Switch 810 case which has been fully loaded with 140mm fans and the hardware for our AMD FX test system. Eventually the loop will be expanded to include at least one GPU and possibly the northbridge.
Learning to swim
All of the parts have arrived. I’m pretty excited to get moving on the project, but nervous at the same time. There are a lot of things that could go wrong. In the end though, I believe the final product will be well worth the risk.
Many thanks to Icrontic members Snarkasm, boasist, and csimon for their guidance in selecting components and the knowledge they passed on.






 Articles RSS